golden hour

When Your Sunset Is A Bust

FIVE TIPS TO ACHIEVE A GOOD IMAGE

Every landscape photographer has been there: you travel across the globe to a spectacular location, hike for miles, maybe even set up a campsite, and wait for hours to capture your subject in the best light, and … the sunset (or sunrise) is a total bust. I’ve previously shared some tips for photographing during inopportune times and in harsh light, so today we’ll switch focus to when you’re shooting in the best possible times and the sky just doesn’t cooperate. Each of the images we’ll review today resulted from a failed attempt at capturing a colorful sunset (or sunrise).

MINIMIZE THE SKY

It may seem obvious, but I’ve seen many photographers in denial force a sunset shot in cloudless boring skies. They’ll compose to include way too much of nothing – better to accept that the sky is not the star of the show, and recompose for a more interesting image. Let’s look at an example below. Admittedly, I could have fared much worse with this sky, but what you see in the image is quite literally the only patch of sky that displayed any color that evening. I initially envisioned a leading line toward the mountain as a foreground element, with about 60% of the image composed for the sky. This image turns that on its head and gives the illusion of a great sunset when in fact it was very limited and unimpressive. 

This image gives the illusion of a great sunset – in reality, it was limited to a very small area of the sky

CUT OUT THE SKY ENTIRELY

Similar to the previous tip, there are scenes that don’t call for any sky whatsoever. Novice photographers are taught to adhere to the rule of thirds, which in the case of a dull sky implies that only the top one-third of the image should feature the sky, but this formula should be discarded at times for a more creative approach.

Above: The rule of thirds is one of the first compositional principles taught to new photographers. It is a useful concept, but should not be used prescriptively.

In the following two examples, the sky was painfully clear and without any color. The first image was taken at sunset, though you wouldn’t know it since there is nothing in the light quality to suggest it. Eliminating the sky adds some mystery to how steep the waterfall really is (the top is just out of frame, but you can imagine it being much taller). Normally I do not like to include people in my shots, but the woman in red provided such a terrific contrast and sense of scale that I actually hoped she would stay still in that spot for a few minutes (and by pure luck, she did). 

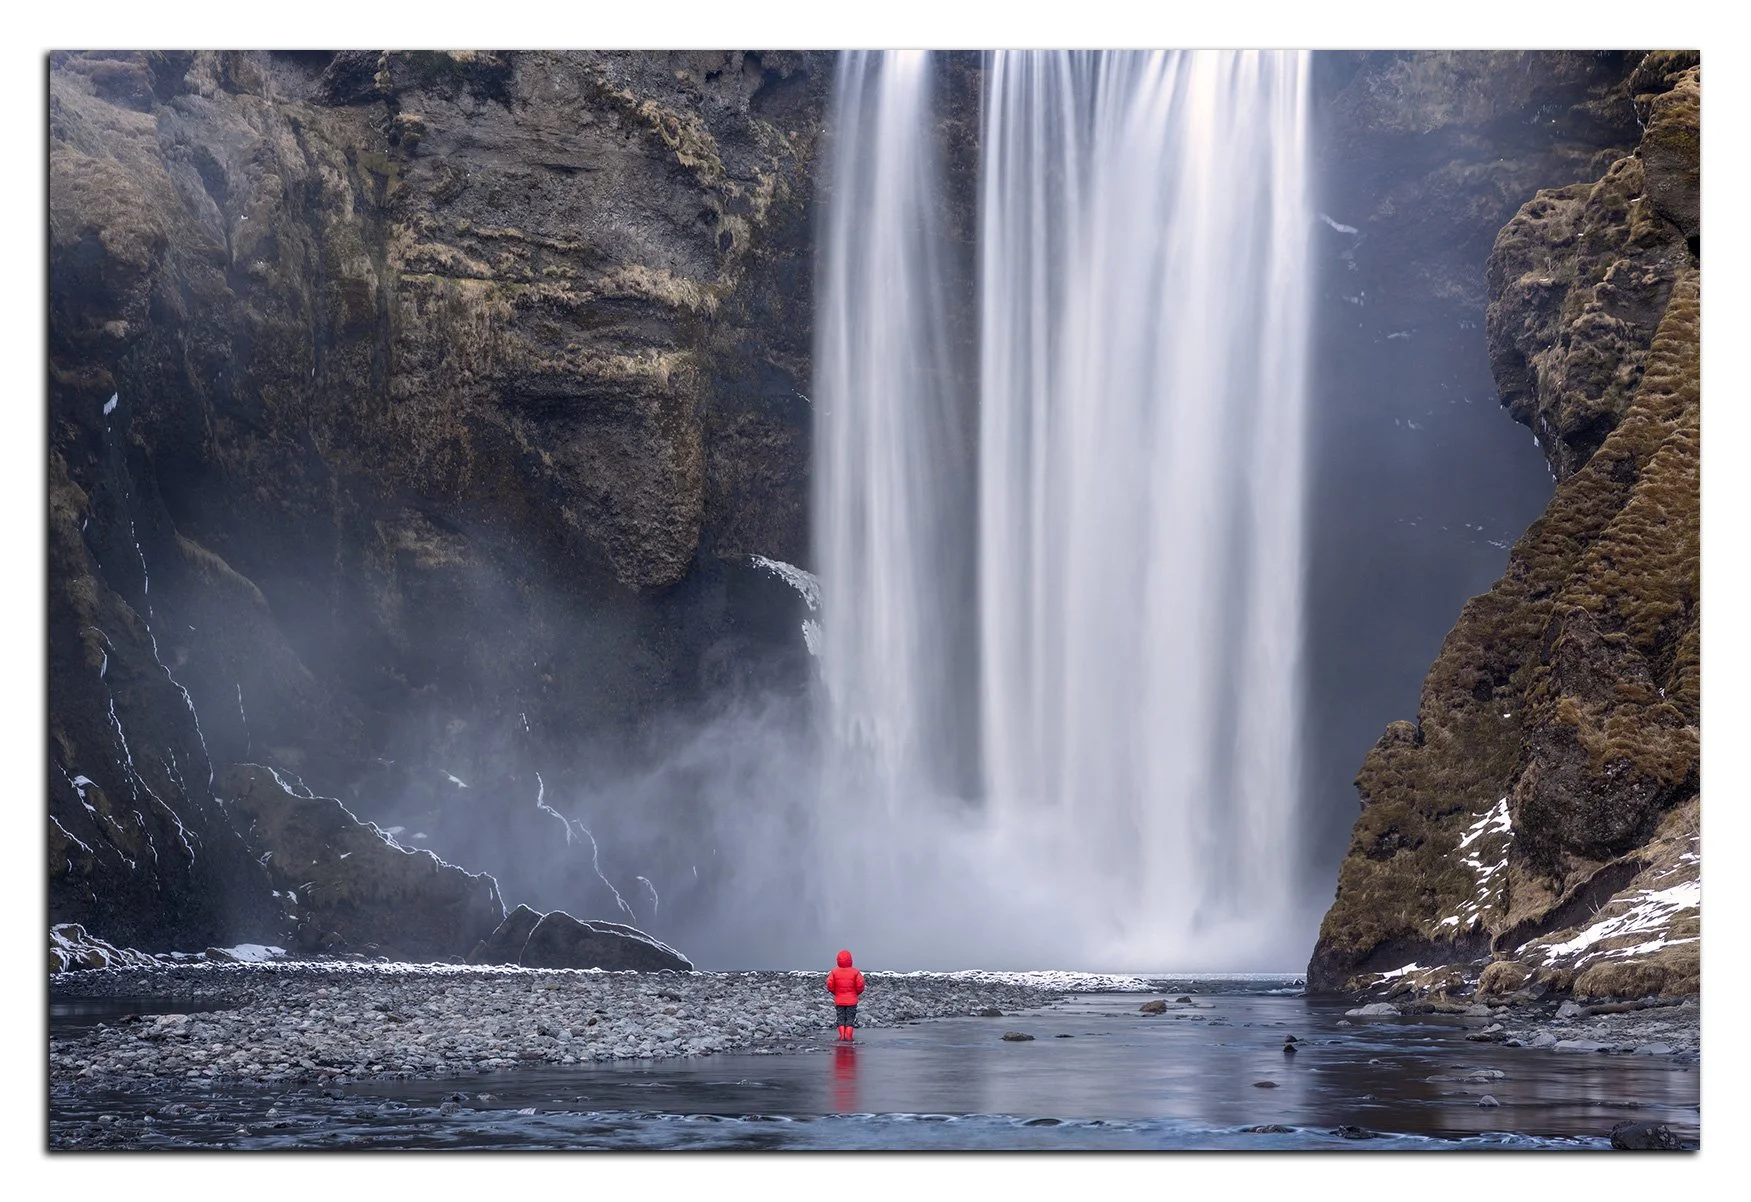
There is no requirement to include the sky in your shot, even at sunset or sunrise

I love top-down drone shots, but rarely think of them at sunset since there is so much emphasis on capturing a colorful sky. This is actually a failed sunrise shot – completely clear skies did not deliver anything worthwhile. Instead, I composed straight down and focused on the long shadows and soft light as the sun peeked over the horizon.

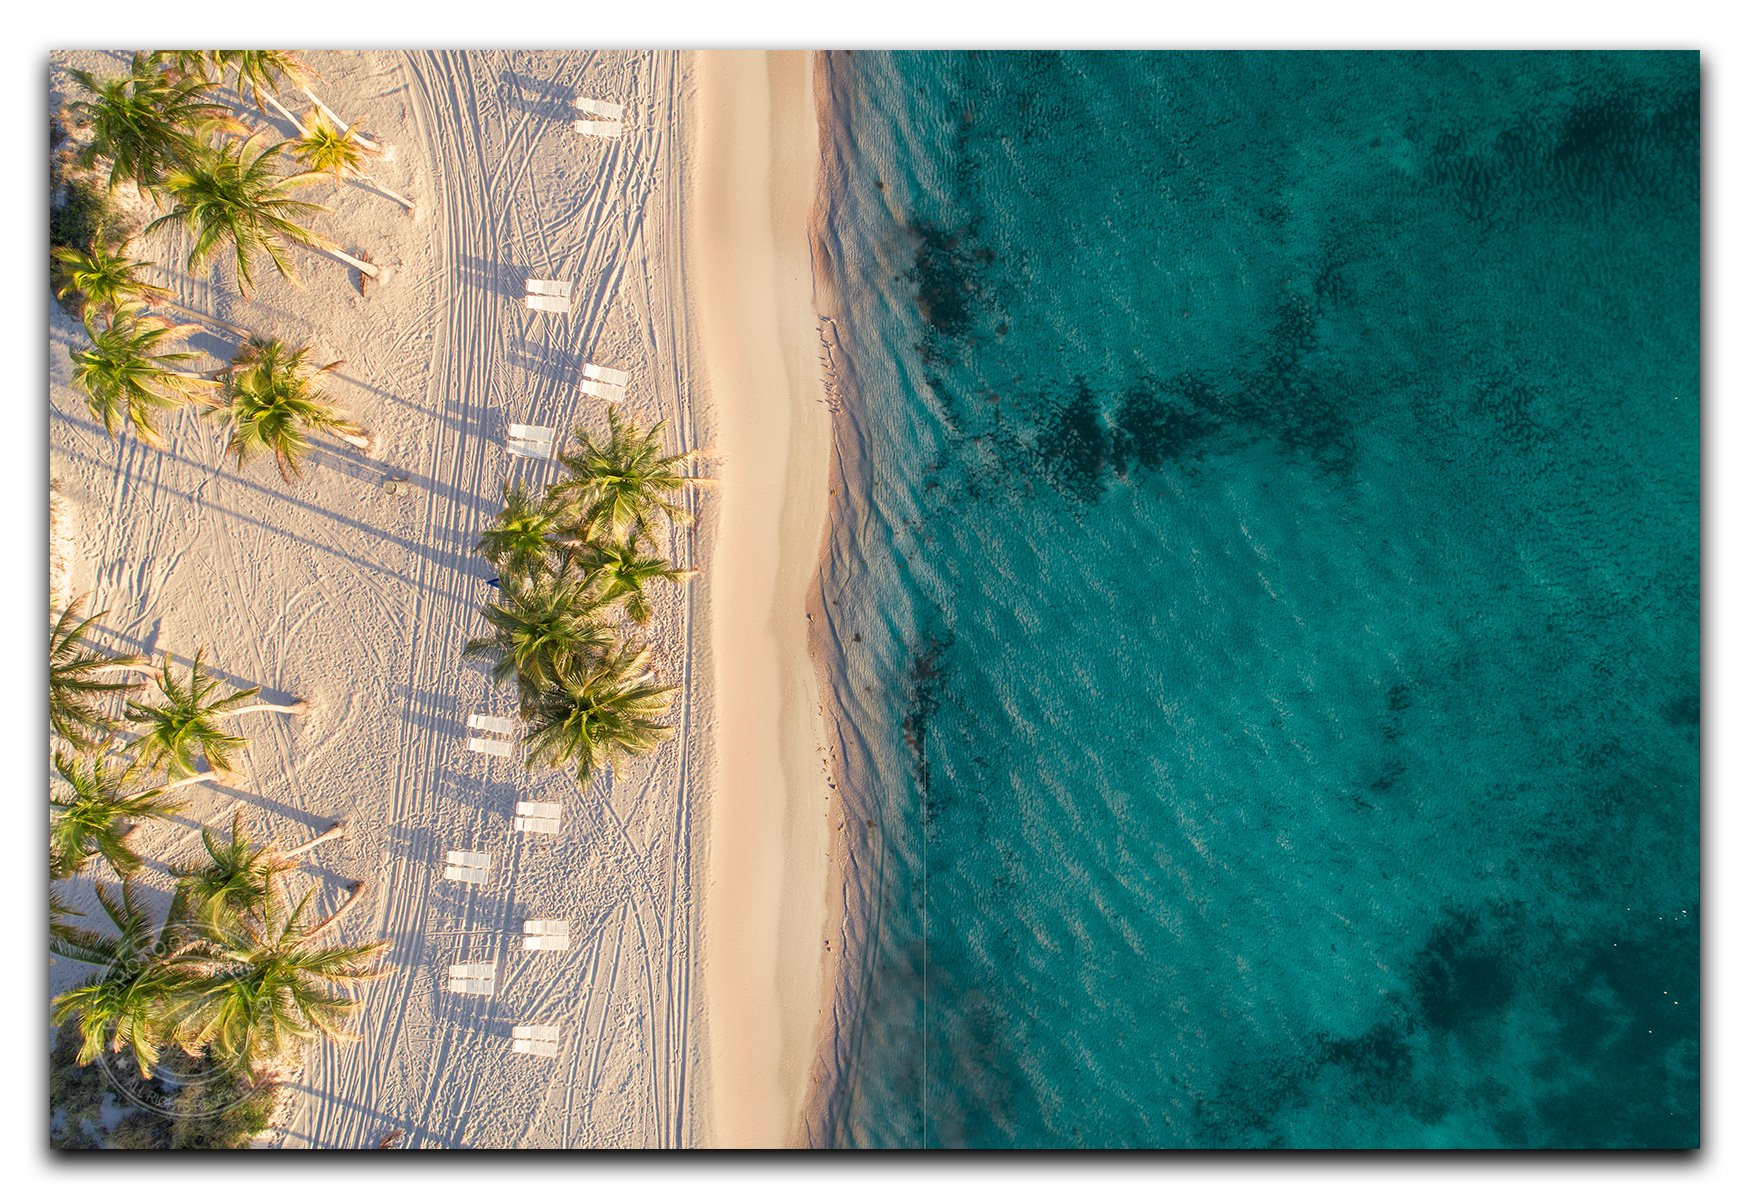
Sunrise did not deliver nice color, but the delicate light and long shadows provided an opportunity for a drone shot

WORK IN THE GOLDEN HOUR

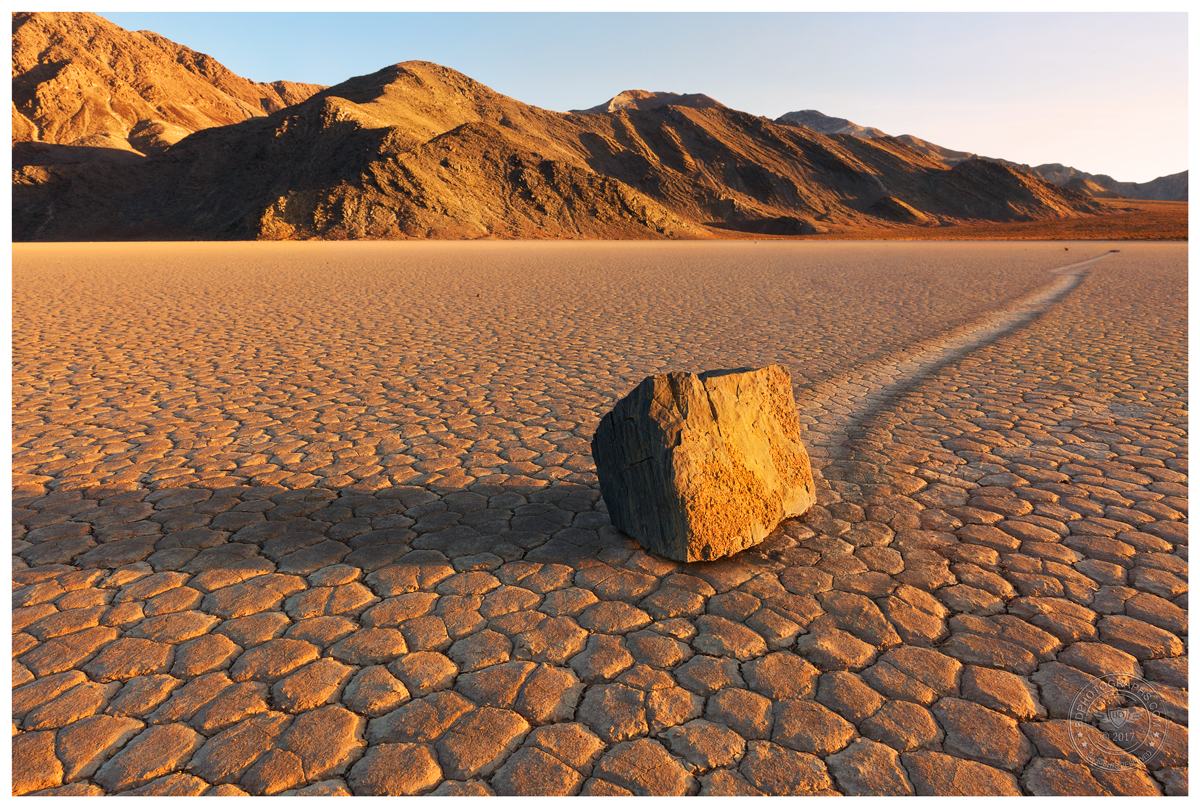
As I’ve developed my photography portfolio over the years, I find golden hour to be my favorite time to shoot. Golden hour is the time when the sun is very low in the sky, usually the final 30 minutes before sunset (or first thirty minutes after sunrise). I visited this location in Death Valley with three shots in mind: a golden hour shot, a sunset shot, and a nighttime milky way shot. I knew that in the dry desert basin clear skies are common, so capturing color in the sky would require some type of weather system. In the end I achieved two out of three shots (the sunset was a bust), and walked away very happy with the result.

Golden hour provides an opportunity to capture long shows and beautiful light

WORK IN THE BLUE HOUR

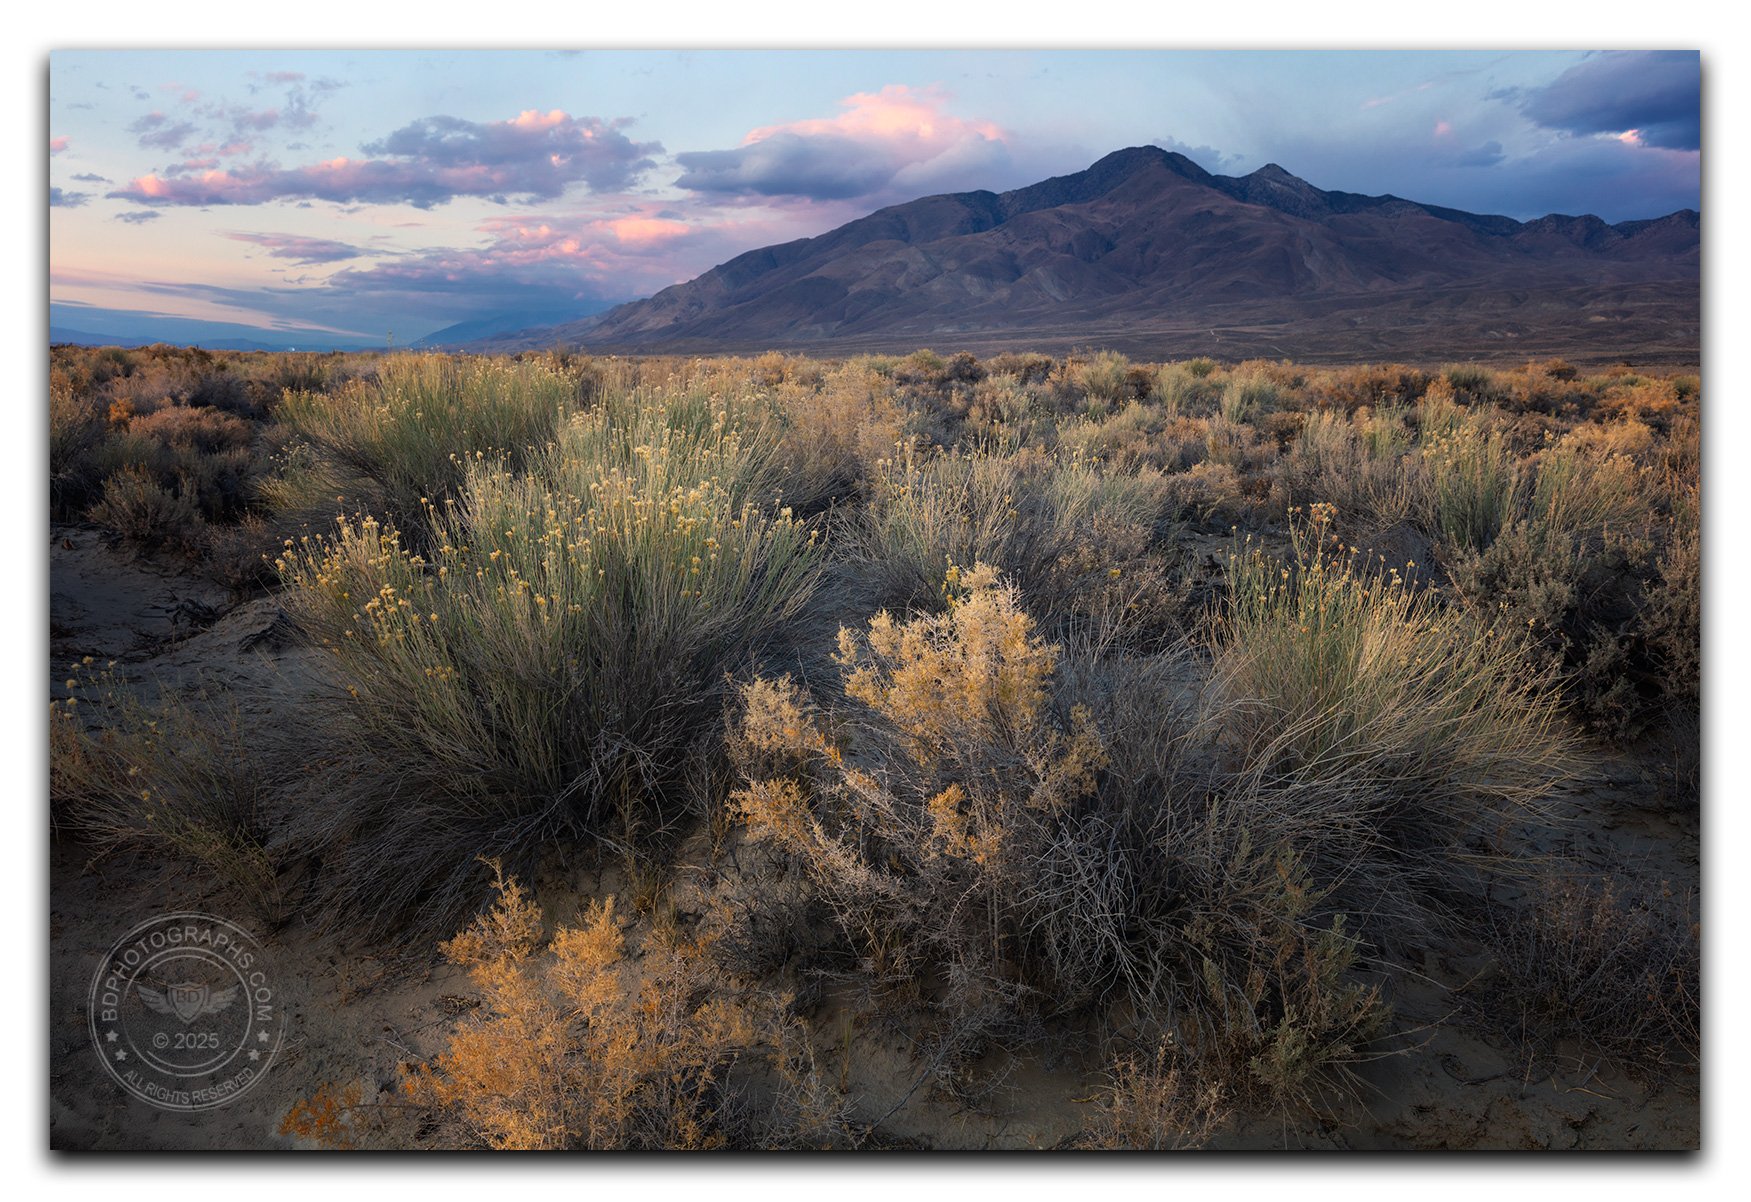
Just as golden hour delivers a unique quality of light, blue hour drapes the landscape in a soft, cool, cinematic tone. It is by far my favorite time to shoot cityscapes, and can be a spectacular condition in which to capture landscapes as well. Blue hour occurs after sunset and before full darkness of night. Likewise, the pre-dawn blue hour transitions from the night and ahead of sunrise.

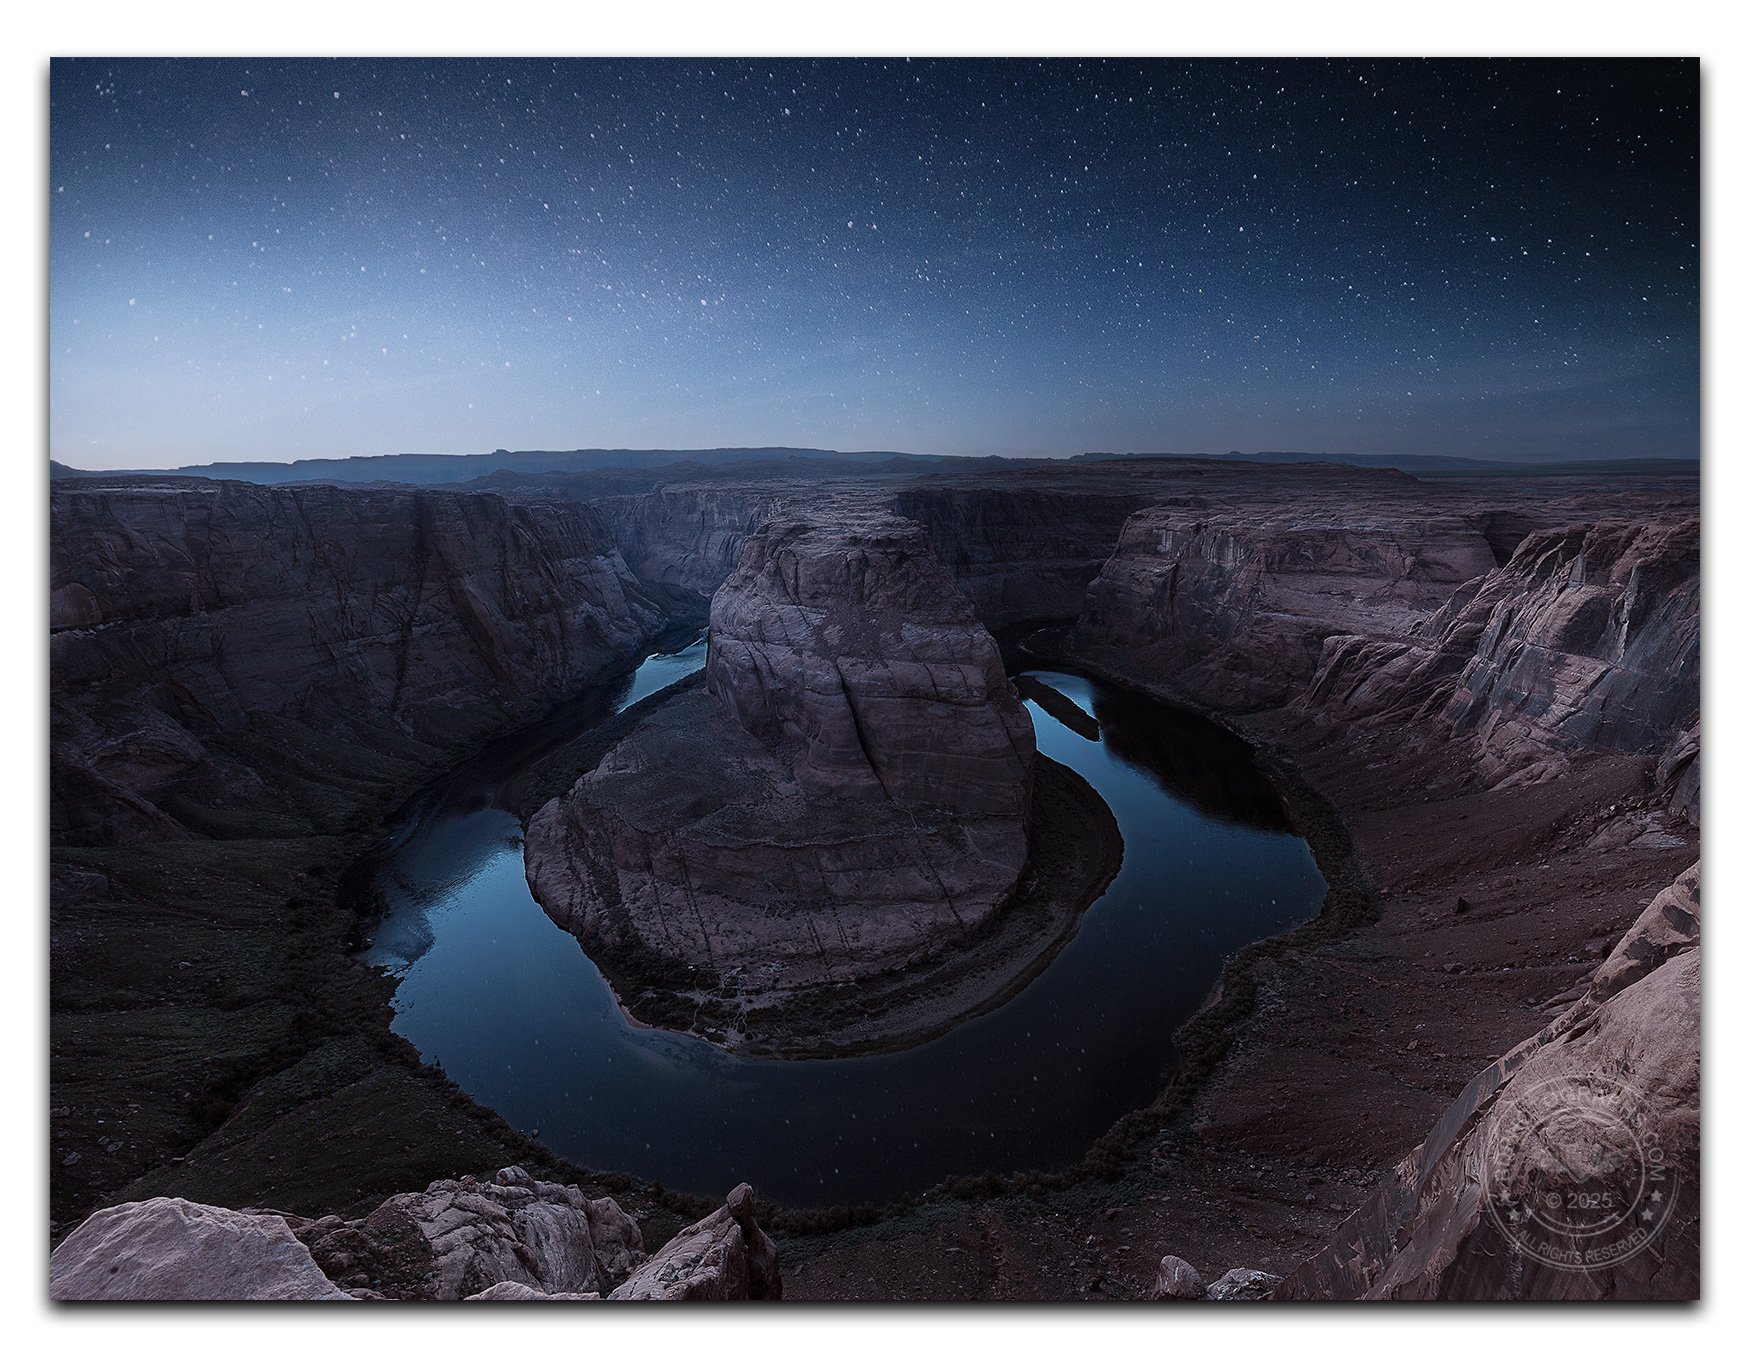
Most photographers visit this location for a sunset capture, but those who stick around into the blue hour will be rewarded with a magical and more original shot

Keep in mind, in lower light conditions it is advisable to shoot with a tripod as you’ll need to take longer exposures. For most of these types of images I shoot with my primary full frame camera and a wide angle lens, or a medium-wide lens

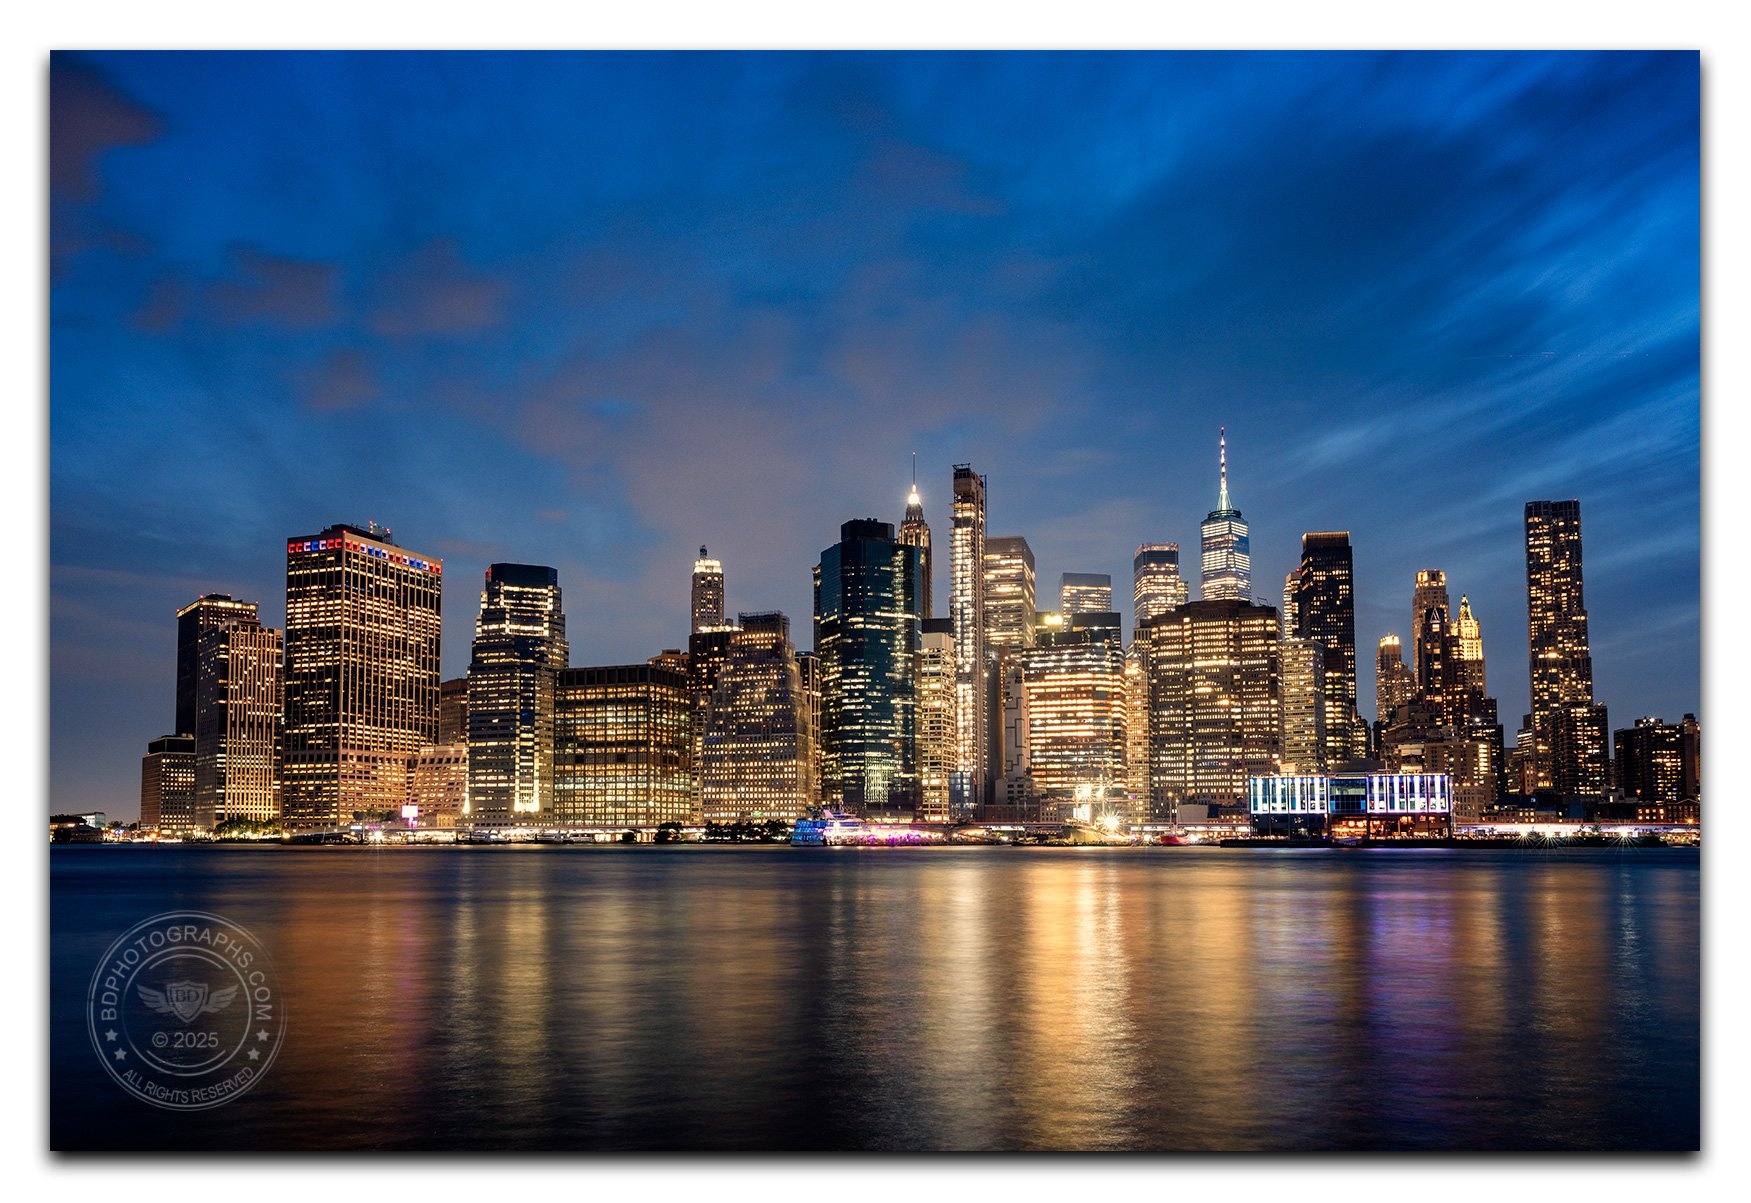
Blue hour is my favorite time of day to photograph cityscapes

CHANGE YOUR SUBJECT

A dull sunset might force you to completely rethink your photoshoot. In general it helps to narrow your framing when light is not favorable. In this image, the soft light was pleasing, but the sky was drab and lacking color. Instead of my original subject (a nearby marina at sunset), I chose this snow-covered vintage Mercedes. The winter sunset is implied by the reflections without featuring directly in the scene.

Sometimes a sunset is better captured with subtlety

The Shot: Rock Trails

The Shot: Rock Trails
Location: Death Valley, California
Skill Level: Intermediate
Techniques: Scouting and preparation, wide-angle photography
Recommended knowledge: Setting your camera’s aperture, shutter speed, and ISO. Changing the autofocus point. 


Quite often the majority of the work required to make an image occurs before the camera ever snaps a shot. In this post we’ll take a bouncy ride out to one of the more remote spots on the continent to catch the short but beautiful moment before sunset known as “golden hour”. 

OUR DESTINATION
Racetrack Playa in Death Valley National Park is a unique location famous for its mysterious “moving” rocks. Along the scaly texture of a dry lakebed, rocks dot the surface with tell-tale and seemingly impossible trails in their wake (more on how this phenomenon occurs later). I had seen photos of this location, mostly taken in mid-daylight hours, and decided to attempt a golden hour shot. 

TRAVEL
The most difficult part of capturing an image like this is actually getting there. Death Valley National Park is remote (four hours drive from Los Angeles and two from Las Vegas), and Racetrack Playa is relatively deep in a secluded part of the park. For seven months of the year the average temperature high is greater than 90°F (32°C) making it one of the most inhospitable locations to visit in the United States. From the visitor’s center in the park, it is an 83 mile drive including 27 miles on a rough single-lane dirt road. That may not seem like much, but the rugged washboard prevents travel speeds more than about 15-20 miles per hour. In all, the dirt road portion of the drive it is about one and a half hours of non-stop bouncing and rattling. Be sure to have your gear stowed in protective padding (and book an appointment with your chiropractor). I’d definitely advise against attempting this drive in a car unless it has sufficient clearance, solid 4-wheel drive (not the same as all-wheel drive), high tolerance for off-road abuse, and a good spare tire. Many visitors rent Jeeps fitted for off-road use.  

The route from the Furnace Creek Visitor’s Center. West of Grapevine Peak the drive switches from paved to dirt roads. Expect to be on the dirt roads for about 1.5 hours at speeds no greater than 20mph. (courtesy: Google Maps)

The route from the Furnace Creek Visitor’s Center. West of Grapevine Peak the drive switches from paved to dirt roads. Expect to be on the dirt roads for about 1.5 hours at speeds no greater than 20mph. (courtesy: Google Maps)

SCOUTING
Once at the playa, and after a good stretch of the arms and legs, I ventured out onto the playa itself. Common sense (and park rules) prohibits driving onto the playa - there is ample parking at the end of the dirt road. Sadly, much of the playa was defaced in 2016 by joyriding morons. Instead of rock trails, visitors were left with criss-crossing ugly black tire marks. It could take years before there is enough rainfall to wash away the damage. Locals told me this is not the first such incident and that the park may admit future visitors to the playa by permit only, or not at all. This is why we can’t have nice things.

For a golden hour shot, it’s important to arrive well in advance of sunset to find the right composition, read the light, and set up your gear. You should also research the direction of the sunset to help decide whether you want a back-lit, front-lit, or side-lit shot. Suncalc.net is a free resource for determining the direction of sunrise and sunset. Popular smartphone apps include The Photographer’s Ephemeris and Photopills (more on how to use these apps in a different blog post). Early arrival at the site will also allow you to take some time to explore and simply enjoy the experience - something that will be more difficult when you’re focused on photography during the fleeting moments of golden hour. Part of the fun here is searching the area and choosing your favorite rock and composition. With a short while before golden hour, it’s time to set up the tripod and take some test shots.


I use Adobe Photoshop and Lightroom to process all my images. Try them for free using this link.


TECHNIQUE
Wide Angle shots: For a dramatic close-up of the subject, choose a wide angle lens and set up low and very close to the rock. I used a Canon EF 16-35mm f/4 lens on my Canon 5D Mark III for this image. Wide angle lenses exaggerate and distort the size of anything near the lens, while diminishing the scale of more distant objects. 

Focus stacking: In this type of shot, even with a narrow aperture (f/22) there may not be enough depth of field to achieve sharp focus of the foreground and background in a single exposure. To compensate for the limited depth of field, photographers sometimes use a focus stacking technique (combining multiple exposures each with a different focal point - e.g. one that focuses on the foreground, a second on the middle ground, and a third on the background. More on that in a different post). We’ll keep things simple, and in my case I did so out of necessity. Because I arrived later than expected, there wouldn’t be much time before the sun dipped below the mountains to the west, and the golden light would disappear. 

Narrow aperture: If you are going to achieve focus in one exposure, make sure to dial back the aperture to f/16 or narrower, focused on the foreground subject. If you are too close to the rock, you’ll need to focus stack in order to achieve sharpness throughout. Because you’ll be using a relatively narrow aperture in diminishing light, you’ll need to compensate with shutter speed and/or ISO for a proper exposure. (Need to brush up on exposure and how aperture, shutter speed and ISO work?) Remember that a longer shutter speed will cause moving objects (e.g. moving clouds, blowing sand) to appear blurry or as streaks. This can be a very pleasing effect, but if it’s not what you desire, and you prefer to keep moving clouds sharp you’ll need to limit shutter speed and compensate by raising the ISO. 

Focus: For a single shot, keep the autofocus point on the foreground subject. If the camera is on a steady tripod, turn off image-stabilization (vibration reduction) on the lens if possible. Only keep it enabled if conditions are very windy.

Exposure: use your histogram to ensure highlights are not blown out, especially the sunlight on the mountains. Use bracketing or HDR if desired (if you are not shooting in the direction of the sun this should not be required.)

Positioning: Keep your camera height below or on the same horizontal plane as your subject to achieve a dramatic effect. Most rocks are not more than one foot in height, so you’ll need to be low. A tripod is needed for this type of shot due to the low light and potential slow shutter speed. It’s also hard on the knees and back to get down that low - let the tripod do the crouching and use a remote to trigger the shutter. 


Interested in photography gear and supporting small business? Check out Adorama


Perspective and lighting make all the difference. In this shot the camera is on a tripod roughly three feet in elevation and the golden light has disappeared behind the mountains. The rock looks small and the light is flat. For the portfolio shot, t…

Perspective and lighting make all the difference. In this shot the camera is on a tripod roughly three feet in elevation and the golden light has disappeared behind the mountains. The rock looks small and the light is flat. For the portfolio shot, the camera was less than a foot off the ground and the sunlight was almost horizontal from the west, giving us a golden light quality and long shadows.

FINAL THOUGHTS
Use your judgment about what can be achieved in the time that you have and remember that it’s better to take more pictures than you need. Golden “hour” is variable in length depending on where you are (latitude) and the time of year - but the blue hour following sunset (or preceding sunrise) can be just as magical - so don’t pack up too early. At the playa remember to seek out more than one rock and alternate compositions! When you return to your hotel or campsite, after the long bouncy ride, put your feet up, have your favorite beverage, and review your photos - I like to rate my favorite ones in camera or in Adobe Lightroom. Then sleep on it and pick your finalists afterward. 

Some additional considerations: Racetrack Playa is a special place and worth the trek. Before visiting this location, consider weather conditions (especially if there is rain or flash flooding in the forecast, or in the heat of the summer months), research driving options, pack enough water (then double that amount), bring warm clothing in winter, and tell someone where you’re going and when you’ll be back. Bring a flashlight (or two), batteries, and GPS. Travel with a companion (the human kind). As in most desert locations, dust and sand can be a problem and won’t play nicely with electronics. If shooting with a DSLR or mirrorless camera, choose your lens and mount it to the camera body before you pack your gear, then leave your gear packed until you arrive.

SUMMARY

  • Plan the shot with directions, time of day, and logistics

  • Research the time and direction of sunset

  • Check the weather forecast

  • Bring a friend and tell someone where you’re going and when you expect to return

  • Pack the essentials including water, sunscreen, proper attire, flashlight, extra batteries and a first aid kit

  • Arrive early and walk around for a while until you find a composition you like

  • Get close to your subject and on the same horizontal plane

  • Dial back (stop-down) your aperture to ensure a greater depth of field (i.e. keep everything in focus)

Feeling accomplished during blue hour. Unlike our wide-angle close-up, the rocks don’t look very big when photographed from this perspective.

Feeling accomplished during blue hour. Unlike our wide-angle close-up, the rocks don’t look very big when photographed from this perspective.

MYSTERY
I almost forgot - what about the mysterious moving rocks themselves? People have theorized that gale-force winds move them, while the less-scientifically inclined envisioned ghosts or aliens. Until recently, we did not have a definitive answer. This video explains the mystery. Enjoy!


Interested in starting a website or blog? How about a place to display your photos online? I use Squarespace as my platform. Get started for free — click the image below.